반응형
< (2) SNS 서비스 개발 (회원가입, 로그인, 로그아웃 기능) >
# 이제 회원관리 API부터 작성해보자
- 이전에 성공했던 프로젝트에서 config, utils, mysql_connection 복사 붙여놓기하고
- mysql_connection 만 접속할 DB 내용대로 수정해야 한다!
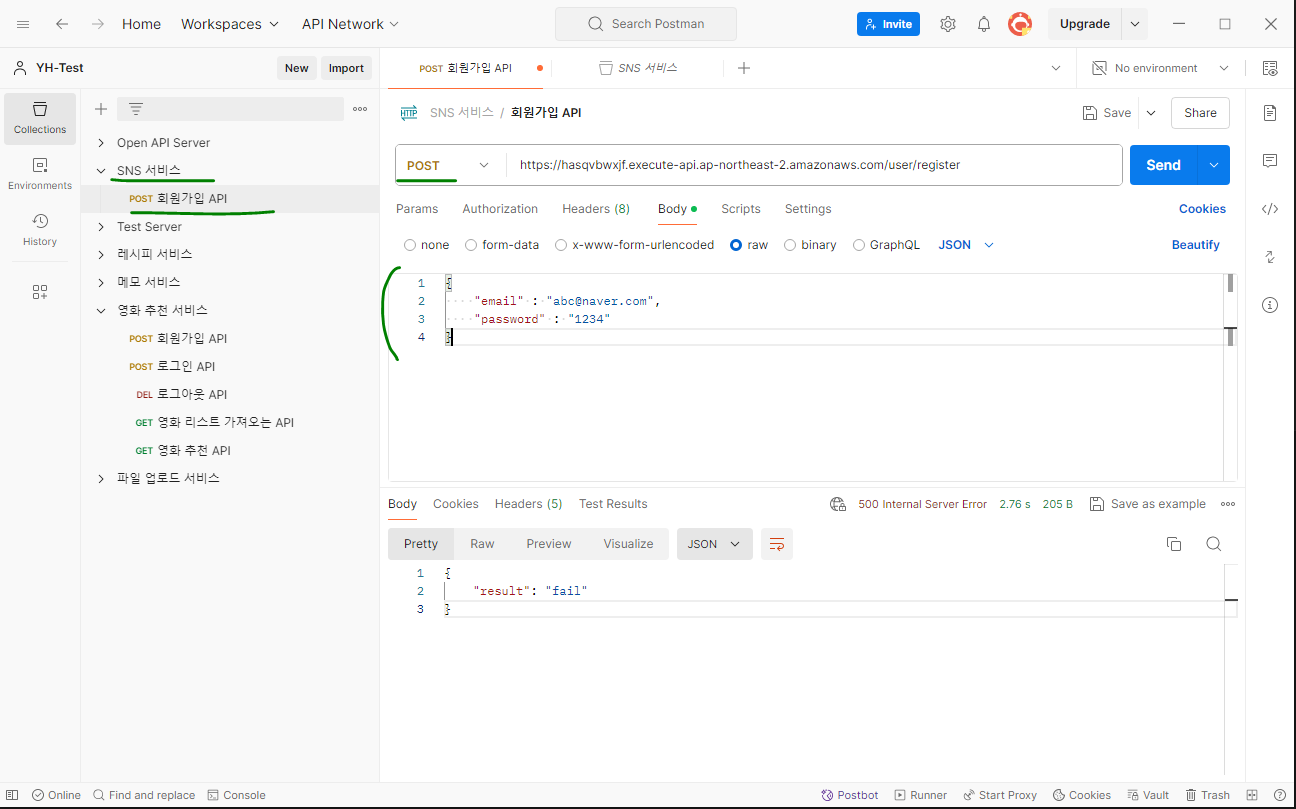
# 그다음 Postman 접속하여서 API 설계 및 리퀘스트 생성
- 이전에 생성했던 것들 copy해서 사용

# 회원 관리 내용은 크게 수정할 부분이 없어서 이전 프로젝트랑 동일하게 작성
from email_validator import EmailNotValidError, validate_email
from flask import request
from flask_jwt_extended import create_access_token, jwt_required, get_jwt
from mysql.connector import Error
from flask_restful import Resource
from mysql_connection import get_connection
from utils import check_password, hash_password
# 회원가입 API
class UserRegisterResource(Resource) :
def post(self) :
# 1. 클라이언트가 보낸 데이터를 받아준다.
# 포스트맨으로 작성한 body 데이터를 json으로 받아온다.
data = request.get_json()
print(data)
# 2. 데이터가 모두 있는지 확인 (두가지 방법)
# 1) if 문으로 나누어서 작성 (이게 좀더 직관적으로 구분되므로 해당 방법 추천)
#if 'email' not in data or 'username' not in data or 'password' not in data :
# return {"result" : "fail"}, 400
#if data['email'].strip() == '' or data['username'].strip() == '' or data['password'].strip() == '' :
# return {"result" : "fail"}, 400
# 2) if 문 길게 한줄로 작성
if data.get('email') is None or data.get('email').strip() == '' or \
data.get('password') is None or data.get('password').strip() == '' :
return {'result' : 'fail'}, 400
# 3. 이메일주소 형식이 올바른지 확인
# 지정된 형식인 EmailNotValidError 사용 (정의된 라이브러리이므로 해당 형식 그대로 사용해야함)
try :
validate_email(data['email'])
except EmailNotValidError as e :
return {'result' : 'fail', 'error' : str(e)}, 400
# 4. 비밀번호 길이가 유효한지 체크한다.
# 예) 비번은 4자리 이상 12 자리 이하
if len(data["password"]) < 4 or len(data["password"]) > 12 :
return {'result' : 'fail'}, 400
# 5. 비밀번호를 암호화 한다.
password = hash_password( data['password'])
print(password)
# 6. DB에 저장한다.
try :
connection = get_connection()
# 이번 쿼리문 작성 주의할점! record에 password는 암호화된 패스워드를 가져와야 하기 때문에 상단에서 암호화한 변수로 지정해줘야함!
query = '''insert into user
(email, password)
values
(%s, %s);'''
record = (data['email'], password)
cursor = connection.cursor()
cursor.execute(query, record)
connection.commit()
### 중요하다!!!
### DB에 회원가입하여, user 테이블에 insert 된 후,
### 이 user 테이블의 id 값을 가져와야 한다.
### 생성한 변수를 마지막 리턴에 작성하여 클라이언트에게 보내준다.
user_id = cursor.lastrowid
cursor.close()
connection.close()
except Error as e:
if cursor is not None:
cursor.close()
if connection is not None:
connection.close()
return {'result' : '이미 가입된 계정 입니다.'}, 500
# 6-2. user_id를 바로 클라이언트에게 보내면 안되고,
## JWT 로 암호화 해서, 인증토큰을 보내야 한다.
### 토큰 만료시킬때 사용
# access_token = create_access_token(user_id,
# expires_delta= datetime.timedelta(minutes=3))
access_token = create_access_token(user_id)
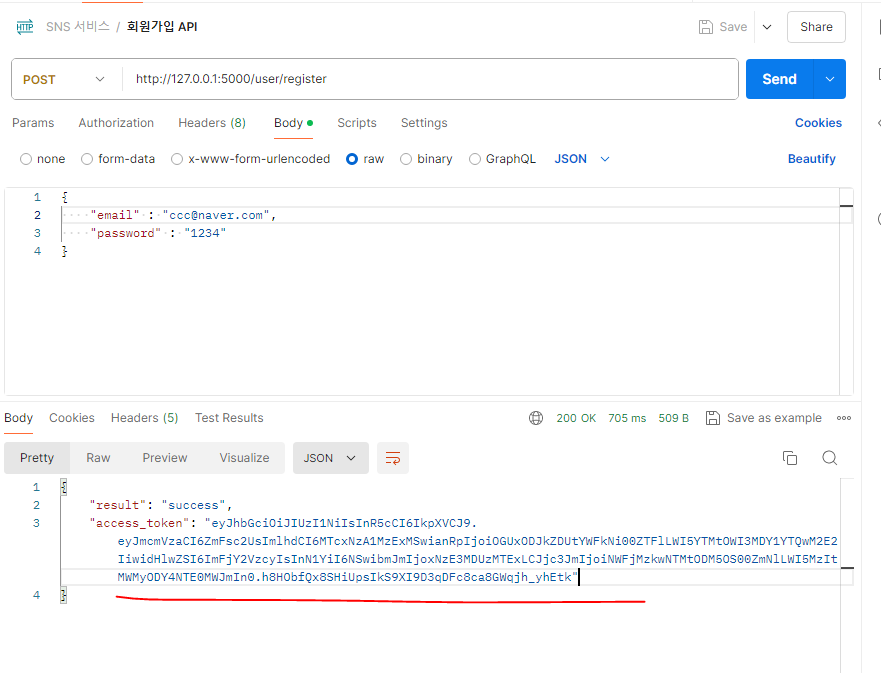
# 7. 응답할 데이터를 JSON으로 만들어서 리턴!
return {"result" : "success", 'access_token' : access_token}
# 이렇게 생성한 user_id는 결국 생성한 레시피를 DB에 저장할때 구분하기 위해서 만든것이므로 생성한 user_id 컬럼을 레시피 파일에 메뉴 생성 API 함수에다가 추가해줘야한다.
# 이제 수정이든, 삭제든 user_id가 필요해졌는데 이게 보안되지 않으면 제3의 인물이 user_id를 동일하게 해서 생성하거나 삭제할수도 있다. 이게 해킹
# 그러므로 인증토큰(jwt)이 필요하다! jwt 라이브러리 설치! pip install flask-jwt-extended
# 하고 결과에 access_token으로 생성한 변수를 추가해 준다.
# 로그인 API
class UserLoginResource(Resource) :
def post(self) :
# 1. 클라이언트로부터 데이터를 받는다.
data = request.get_json()
if 'email' not in data or 'password' not in data:
return {'result' : 'fail'}, 400
if data['email'].strip() == '' or data['password'].strip() == '':
return {'result' : 'fail'}, 400
# 2. DB로부터 이메일에 해당하는 유저 정보를 가져온다.
try :
connection = get_connection()
query = '''select *
from user
where email = %s;'''
record = (data['email'] , )
cursor = connection.cursor(dictionary=True)
cursor.execute(query, record)
result_list = cursor.fetchall()
print(result_list)
cursor.close()
connection.close()
except Error as e:
if cursor is not None:
cursor.close()
if connection is not None:
connection.close()
return {'result':'fail', 'error':str(e)},500
# 3. 회원인지 확인한다.
if result_list == [] :
return {'result' : 'fail'} , 401
# 4. 비밀번호를 체크한다.
# 유저가 입력한 비번 data['password']
# DB에 암호화된 비번 result_list[0]['password']
isCorrect = check_password(data['password'] , result_list[0]['password'])
if isCorrect == False :
return {'result' : 'fail'} , 401
# 5. 유저아이디를 가져온다.
user_id = result_list[0]['id']
# 6. JWT 토큰을 만든다.
# access_token = create_access_token(user_id,
# expires_delta= datetime.timedelta(minutes=3))
access_token = create_access_token(user_id,)
# 7. 클라이언트에 응답한다.
return {'result' : '로그인 되었습니다.', 'access_token':access_token}
# 로그아웃 API => 다른 user API들에비해 복잡도가 있다!
# 로그아웃된 토큰을 저장할, set을 만든다.
jwt_blacklist = set()
class UserLogoutResource(Resource) :
@jwt_required()
def delete(self) :
# 메뉴얼대로 작성하는것!
jti = get_jwt()['jti']
jwt_blacklist.add(jti)
return {'result' : '로그아웃 되었습니다.'}
# app.py에 연동
import serverless_wsgi
from flask import Flask
from flask_restful import Api
from flask_jwt_extended import JWTManager
from config import Config
from resources.posting import PostingListResource
from resources.user import UserLoginResource, UserLogoutResource, UserRegisterResource, jwt_blacklist
app = Flask(__name__)
# 환경변수 셋팅
app.config.from_object(Config)
# JWT 매니저 초기화
jwt = JWTManager(app)
# 로그아웃된 토큰으로 요청하는 경우, 처리하는 함수 작성
@jwt.token_in_blocklist_loader
def check_if_token_is_revoked(jwt_header, jwt_payload) :
jti = jwt_payload['jti']
return jti in jwt_blacklist
api = Api(app)
# 경로와 리소스를 연결하는 코드 작성
api.add_resource( UserRegisterResource , '/user/register')
api.add_resource( UserLoginResource , '/user/login')
api.add_resource( UserLogoutResource , '/user/logout')
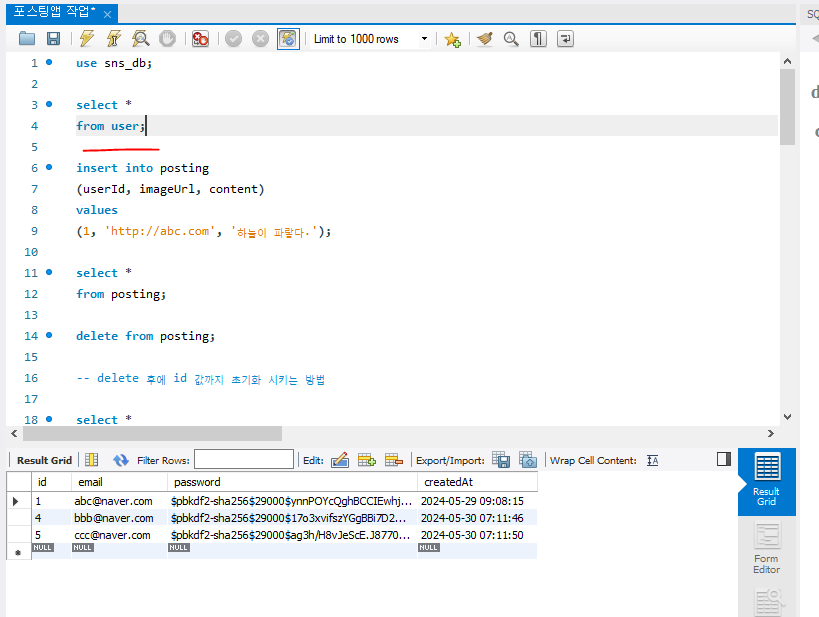
# flask run 실행 후 Postman 에서 SEND 하여 테스트
- MySQL Workbench에 유저 목록에 등록되었는지도 확인해야 한다.
다음 게시글로 계속~!
728x90
반응형
'API 개발 > API 개발 Project' 카테고리의 다른 글
| API Project : (3) SNS 서비스 개발 (사진 포스팅 + 태그 자동 번역 기능) (8) | 2024.05.30 |
|---|---|
| API Project : (1) SNS 서비스 개발 (기본 세팅부터 진행!) (0) | 2024.05.29 |
| API Project : (2) 영화 추천 API 개발 (대용량 파일 Docker 서버 배포) (1) | 2024.05.29 |
| API Project : (1) 영화 추천 API 개발 (DB 데이터 json으로 가져오기) (0) | 2024.05.29 |
| API Project : 메모앱 API 서버 개발 (0) | 2024.05.29 |